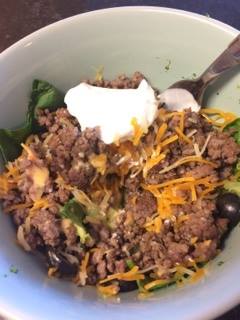
Taco Veggie Bowl

nasty

My church group feeds me every Tuesday night, and it’s great. It’s so nice to have an evening off from cooking and dishes, and the food is always lovely! However, I cannot say that the food is always healthy. I usually make Tuesdays my splurge night for that reason, and eat my meal happily.

However, there are always leftovers to take home. I have trouble eating heavy leftovers after a heavy meal, but I also feel bad not taking home free food! So, every week, I try to makeover the leftovers into something healthy for lunch on Wednesday.

This week was tacos, so I just brought home cooked beef, queso, veggie toppings, sour cream, and shredded cheese. I skipped the taco shells and side dishes.

So, that’s the inspiration for this dish: a way to use up leftovers. However, you certainly don’t have to use the leftovers I specifically had; if you have leftover meat of any type, or any leftover sauce and cheese, you can make this. I’ve done this before with leftover sausage, marinara, and mozzarella. You can and should make this your own!

Or, if what I made just sounds really good, make all the ingredients fresh and put it together for real. You do you.

INGREDIENTS (for one bowl- double or triple with whatever you have):

  • 1 cup cooked ground beef (or brown ground meat of any kind in a skillet with some oil until done)
  • 1/4 cup leftover queso (or the jarred kind)
  • 2 tablespoons sour cream
  • 2 cups spinach
  • 1 cup frozen broccoli
  • shredded cheese, olives, lettuce, salsa, any toppings you want

Put the frozen broccoli in a bowl and prepare according to package directions. If it called for you to add water, drain it off after it’s cooked. If you play your cards right, this should be a one bowl lunch. Add the spinach and stir around until the heat from the bowl/broccoli starts to wilt it. Top with queso, beef, and any toppings you want hot (I wanted my cheese melted, so I added that on). Microwave for about 45 seconds, until everything it hot. Top with sour cream and cold toppings.

Lunch is served!

Alternatively, you can throw everything in a skillet, especially if you’re doing more than one portion. But I had no desire to dirty up another dish.


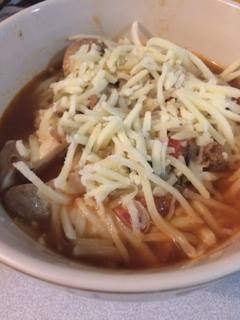
Pizza Craving Soup

music boxisp4

Ahh, pizza. Just the word elicits memories, both pleasant and unpleasant. Ordering pizza with friends during finals week? Pleasant. Pizza parties when you were 7 years old and little Johnny took the last four slices of cheese and only ate 2 but it didn’t matter because you got stuck with sausage? Less pleasant.

Ironically, sausage is now my favorite of the classic pizza flavors. Buffalo Chicken takes the overall prize though, because why not?

Adding to the role of pizza in my life is that I used to be able to get it anytime I wanted in the dining hall. I could get my two slices and a side salad and not feel nasty. Now, if I want pizza that isn’t frozen, I have to order a whole pizza! I simply should not eat a whole pizza before it goes bad, and freezing it just takes up space.

Also, let’s face it, pizza is pretty bad for you. Bread and cheese? Not terrible in moderation, but not a balanced meal.

The solution to portion control and a low-carb alternative? Frickin’ Pizza Soup!

It TOTALLY satisfies the pizza craving. All of the flavors I crave go right into the pot, and I don’t miss a thing. I can make a small batch for myself or a big batch for my friends, and it’s so much cheaper than buying pizza.

I probably didn’t even need to convince you to look at this recipe, but even if I did, I think I’ve done the job. Pizza soup? Done.

INGREDIENTS:

  • 1 pound ground Italian Turkey Sausage (or pork if you prefer)
  • 4 cups beef broth
  • 1.5 cups water
  • 14 oz can tomato sauce
  •  14.5 oz can diced tomatoes
  •  5oz can diced green chilis
  • 1 can artichoke hearts (okay, not a pizza ingredient, but I like them in here. Leave out if you don’t!)
  • 1 package pepperoni
  • 2 cups of your fav mushroom, chopped
  • 1 can hominy, white beans, or chickpeas (Also optional, but these bulk it up a bit)
  • LOTS of mozzarella cheese

TO PREPARE:
Brown sausage in a soup pot. Once brown, remove from pan and drain any fat. Add every other ingredient besides the mushrooms. Bring to simmer, then add mushrooms and sausage back in.

Once it’s hot, it’s done! Taste for seasoning; you may want more water or broth if it’s too acidic for you.

Serve in bowls with so much cheese.

Little Johnny won’t get his hands on this.


Bacon N’ Cheddar Quiche

music box

So, here’s the deal. I don’t really like quiche. Growing up, my mother always over-baked it, used too much cream, and threw in a bunch of seasonings that really didn’t belong.

I have tried other recipes, with other fillings and flavors, and I just can’t stand the stuff.

However, I can, objectively, understand that a lot of people in the world care for quiche. I get the convenience factor: it’s good at several temperatures, it’s versatile, it can be breakfast, lunch, or dinner. It can be a complete meal without a side dish. I get it.

I just don’t like it.

Why, then, am I posting a recipe that I cannot eat? Isn’t that hypocritical, untrustworthy, etc? Shouldn’t I have lied and said that I love the stuff?

I didn’t need to lie. I have seen this quiche be completely demolished every time I make it. I have seen people go back for third and fourth pieces.

This quiche has been requested for me to make, and I never have leftovers. Everyone absolutely loves the stuff.

Therefore, it seems that this quiche must be doing something right.

So, for the sake of all of my quiche-lovers out there, here’s a new one to try. I’ll be ordering a pizza.

INGREDIENTS:

  • 1 unbaked deep dish pie crust (I use store bought for this. This meal is really fast and easy, don’t make it hard!)
  • 5 eggs
  • 1.5 cups half and half
  • 1 cup cheddar cheese
  • 8 strips cooked bacon, chopped
  • 1/2 cup diced onion
  • salt & pepper

Preheat the oven to 350

In a bowl, whisk together the eggs, half and half, salt, pepper.

In the crust, layer the onions, cheese, and bacon. Pour the egg mixture on top.

Put the quiche on a baking sheet in case it overflows. Trust me, it’s worth it.

Bake for 60 minutes, until puffed and a toothpick comes out clean.

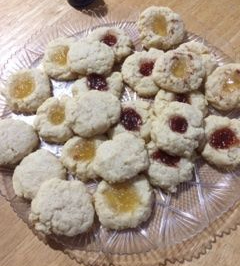
Tender Thumbprint Cookies

nasty

Confession: I do not use my thumb to make the thumbprint in these cookies. My thumb is really small (I have abnormally teeny hands) and all it does is get cookie dough under my nail.

What do I do? I use my middle finger. I debated calling this post “middle finger cookies” for humor, but that seemed a little less than family friendly.

But these cookies? Totally family friendly! I love them because I can make a variety with several different jams, jellies, nuts, or other fillings. So, your fruity child can get his or her fix, while your chocolate lover can get their’s! Or, if you’re me, you opt for the ones you leave plain, with just a sprinkle of sugar on top.

And you serve them with rich hot chocolate covered in whipped cream, to cut the sweetness. 😉

These cookies only bake for ten minutes, but they do require 15 minutes in the fridge to chill. Don’t skip that step! You want all of the butter to harden up so that you get a nice, creamy cookie.

I served these to a friend who was born in the United Kingdom, where shortbread is the most popular cookie, so you know I had faith in these. He ate four, so I think we’re okay!

INGREDIENTS:

  • 1 egg yolk (save the white for breakfast tomorrow!)
  • 1 heaping tablespoon heavy whipping cream
  • 1 heaping teaspoon vanilla (don’t measure this, just go for it)
  • 2 sticks salted butter (or unsalted with some salt)
  • 2/3 cup sugar
  • 2 cups flour
  • Fillings: Apple jam and a sprinkle of cinnamon, pineapple jam, strawberry jam, chocolate spread, a walnut, or nothing!

TO PREPARE:

Preheat the oven to 375, and line two baking sheets with parchment (no need to grease- these cookies don’t stick)

In a small bowl, beat the cream, egg, and vanilla with a fork.

Beat together the butter and sugar until super creamy. Like, 3-4 minutes creamy. Add in the egg mixture. Beat in the flour until combined.

If the dough looks crumbly, add a dash more cream. I swear some days I need it, some I don’t. It’s like the moon cycle determines how crumbly my flour is.

Scoop heaping tablespoons onto the baking sheet. Using your thumb, a small spoon, or your middle finger, create a small indention in the cookies.

After you’ve given all of your cookies the finger, spoon in about half a teaspoon of filling. Don’t overdo it- I know it’s tempting, but save your drippy jelly for your pb&j.

Chill the dough in the fridge for about 15 minutes, until it feels like store-bought cookie dough!

Bake for ten minutes, or until the sides of the cookie are brown. You should be able to poke the jam in the middle and your finger come back clean.

Cheerio!


Classic Spinach and Ham Quiche

me

This is not one of my unique recipes. This is not modern, edgy, or some innovative way to cut carbs. It is not a family recipe that has been passed down from Scotland.

This is plain ole’ quiche, the way my mother has made it my entire life. It is simple, delicious, and very, very normal.

Allow me to qualify: normal does not mean average! This quiche is still delicious, with a buttery, cheesy filling and lots of delicious goodies stirred in. It’s absolutely impressive enough to take to church brunch or your mother-in-law’s house for dinner. I am even serving it to a gender-non-conforming gay man tonight, so you know I trust it!

TOTALLY KIDDING. Not about my dinner guest, he’s my best friend, but about the idea that I think all gay men love quiche. That was there for humor, c’mon.

Moving on from that potentially regretful statement: This quiche is so easy, foolproof, and perfect to make ahead! Because it’s good warm, room temp, or chilled, quiche is the perfect thing to have in your back pocket. Well, the recipe in your back pocket, not the actual quiche. And with only a few ingredients (which you can totally play with and make your own), there’s no reason you can’t throw this together when your dinner plans fall through, or a surprise guest shows up for breakfast!

This is only one of the varieties I make, and I’ll often make two or three if I have a few people coming. That way everybody has something they like, or a couple things they like! And, I can have the leftovers in my lunchbox; no microwave needed.

Okay, I’m done talking up this quiche. Just make it.

INGREDIENTS:

  • 1 deep dish pie crust, unbaked (I use Pillsbury because I’m trash. Can I make one from scratch? Yes. But, like, why?)
  • 4 eggs
  • 1 cup light cream/ half & half (I have no idea if a non-dairy alternative would work here. Give it a shot and let me know if you don’t do dairy!)
  • 1 cup swiss cheese
  • 1.5 cups diced, cooked ham
  • 1 package frozen chopped spinach, thawed
  • 1/2 tsp thyme
  • 1 tsp black pepper

TO PREPARE:

Preheat the oven to 350 degrees.

Take that thawed spinach and dump it in a colander. Take a rolling pin or potato masher and press press press! Get out all of the water and your aggression. DO NOT SKIP THIS STEP!

When you’re feeling nice and cathartic and covered in green water, move on to the eggs. Whisk the eggs, cream, thyme, and pepper in a bowl.

In the pie, layer the spinach, ham, and cheese. Pour the egg mixture over.

Bake for one hour! If you want it chilled, let it cool completely before you refrigerate. It’ll cut cleaner cold if that’s a goal of yours.

Enjoy!

Nacho-topped zucchini

music box

I had long grappled with my favorite food growing up. I, quite simply, liked all foods! Well, cilantro still isn’t my thing, and basil tastes like soap, but mostly, all foods!

I knew I loved sushi, ribs, tortellini, nachos… nachos. Nachos. I knew nachos were at least a top contender my senior year of high school, when I went to a new BBQ restaurant. On the menu were tender ribs, pork sandwiches, cheese fries, all lovely. But I, instinctively, ordered the BBQ nachos.

That moment had no thought, no planning. It was pure impulse based on my taste buds.

There it was. My answer. Nachos!

A few years later, I went to a similar restaurant that also served BBQ Nachos, but this one included a calorie count. 1500 calories for an order. Granted, I never finished a full order, and I knew the stuff wasn’t good for  me. But that’s more calories than I usually eat in a day! Consuming them in one meal?

I couldn’t get it out of my head. But you know what I also couldn’t get out my head? Nachos.

So, I started to evaluate; what was it that I REALLY liked about nachos? The chips were always too salty and crunchy for my taste, and I often would scrape the cheese off with a spoon and eat it. So, I don’t really need chips. Hmmm…

A chip alternative could save me plenty off those calories while adding nutrition. And, of course, making them at home would likely make them healthier. I’ll replace the queso sauce with a conservative sprinkling of cheese, and add guac to compensate for lost creaminess. The BBQ probably added most of those calories, and I don’t really need it. Let’s do ground beef instead, with some light seasoning. No sour cream needed… hmmm….

Suddenly, a low-cal, low-carb nacho idea was coming to me. But what to do with the chips? Cheese crisps? High cal. Kale chips? Would fall apart. Cauliflower? Overdone.

Zucchini was the winner. Delicious, a beautiful color, and totally guilt-free. My favorite food was saved.

And now it’s saved for you, too.

INGREDIENTS (SERVES 4)

  • 4 zucchini
  • 1 pound ground beef
  • 1 teaspoon each cumin, chili powder, salt, pepper
  • 1.5 cups shredded cheddar
  • 2 avocados
  • 1 teaspoon minced garlic
  • 1 tablespoon lime juice
  • additional salt&pepper for guac, to taste
  • Other nacho toppings: salsa, black olives, shredded lettuce, tomatoes, jalapenos, whipped cream… kidding

TO PREPARE:

I do my zucchini in the microwave! It’s easy and less clean up. Slice it all super thin- a mandolin works great, or a very sharp knife and a prayer. Then microwave it on a parchment-lined microwave-safe plate for about 9 minutes. Unless you have a giant microwave and a huge plate, you’ll probably have to do it in batches.

Meanwhile, brown the beef in a skillet with some cooking spray, butter, oil, whatever. As it cooks, add all of the seasonings. Stir until done!

Make the guacamole: Mash the avocado, garlic, lime juice, and salt&pepper together and give it a taste. I like mine pretty garlicy and not too lime, so do what you gotta do. I also mash mine with a fork because I like big chunks.

Assemble! Get your plates ready. Lay down a layer of zucchini, then top with cheese and beef. Do another layer of zucchini, and more cheese and beef. Then, add all of your extra toppings.

Feel free to add BBQ sauce, use ground turkey, do shrimp, add a homemade salsa. It’s nachos! You can’t mess it up.

Anybody else out there have a favorite food you wish you could makeover? Comment and I’ll see what I can do!


No-carb Egg Noodles with Skinny Alfredo

I have been searching for a pasta alternative for most of my life. I’ve tried them all.

Spaghetti Squash? Let’s face it, it looks like spaghetti, but it’s squash. It tastes like squash, it feels like squash. It’s not pasta. It’s a great vehicle for any sauce, so if the sauce is your craving, you’re set. But if you want that nice, starchy mouth-feel of pasta with just a little butter and salt? No bueno.

Zucchini noodles? Much closer to pasta texturally! Much easier to cook! Have I found it? But wait, how did it get soggy so fast? And why is there SO MUCH water at the bottom of my bowl? News flash: zucchini is more water than vegetable. It overcooks in 5 seconds, and so much water comes out that your marinara sauce becomes tomato soup before you can taste it.

I have tried to rectify all of these issues in an attempt to perfect my pasta-alternative. I have cooked spaghetti squash every way imaginable: roasted, boiled, microwaved, cooked whole, cooked halved, cooked in quarters, stuffed with filling and roasted after. It’s delicious, totally. But it’s still freaking squash. My 20-year-old adjective came out there.

I have tried salting zucchini noodles to release water. What’d I get? Salt water. I’ve squeezed them through a cheese cloth and got a lovely zucchini puree. I’ve tried spiraling right before cooking and the day before after leaving them on a paper towel. The water never stops. The only alternative I can see is buying local, organic zucchini that might be less watery. But that’s only a 2-month option, if that, in Arkansas.

Frustrated, I had largely put my pasta-search on hold when cloud bread entered my life. A mixture of beaten egg whites and cream cheese is baked into a fluffy, chewy bite. A bread alternative? Now, that’s a start. Cloud bread worked brilliantly for me, and I began to think; can’t one carb replace another?

Then, I see a similar recipe for an egg fast noodle. This recipe is nearly identical but includes the egg yolk for extra stability. However, an egg fast diet is very high in fat, which I do not necessarily need. Cut some fat, and let’s see if this works.

I put the stuff in the oven, and I’m thinking I’m going to end up with a frittata with alfredo on top. I’m worriedly taking inventory of my actual pasta as a backup plan, when my timer goes off.  I open it, and I see a clean sheet of egg. It looks like plain ole’ egg. How could this be pasta?

I continue with the recipe, cutting it into strips. As I’m touching it, it feels like a normal, cooked egg noodle. Confused as can be, I finish cutting, top it with sauce, and serve it. Suddenly, I’m eating pasta. Wait, no, it’s eggs. No, it’s pasta. I dreamed the egg thing. This is real pasta.

But it wasn’t. This is the only alternative I have found with the chewiness and bite of pasta. My family thought it was normal egg noodles. They could not believe otherwise.

I don’t know how this works. I really don’t. But I don’t need to. I will accept this as a gift from God and keep making my egg noodles. I hope you do, too.

INGREDIENTS FOR PASTA (serves four):

  • 8 eggs
  • 4 oz fat-free cream cheese
  • salt & pepper

To prepare, preheat the oven to 325. Line three 8-inch square baking pans, or one 9×13 and one 8-inch, with parchment paper and plenty of cooking spray.

In a blender, dump in all the ingredients and blend it up. Once it’s combined, blend for another 2 minutes to get lots of air in there. It should look frothy on top- like an egg cream or eggnog.

Divide among pans and bake for 8-12 minutes, until it’s firm. There should be no wet, shiny spots.

Let cool until you can touch it. Remove from pan and slice with a pizza cutter to desired thickness.

Top with this sauce:

INGREDIENTS FOR ALFREDO:

  • 4 oz fat free cream cheese
  • 1 tablespoon margarine or butter
  • 3 chicken breasts, chopped (TOTALLY optional- there’s enough protein in the pasta that you don’t need this at all)
  • 3 cups milk
  • 1.5 cups grated parmesean
  • salt&pepper

To prepare:

Melt butter in a saucepan, and add chicken, over medium-high heat. Stir until the chicken is cooked. (Or, skip this step and just melt the butter if you don’t want meat)

Add the cream cheese and melt. Add the milk and turn the heat up until it starts boiling, stirring constantly to avoid burning. The evaporation is what thickens it, so let it roll. You’ll feel like it’ll never thicken. It will. Boil boil boil!

Add the Parmesan and the seasoning, and keep it thickening until it coats your spoon!

Gently pour the sauce over the sliced pasta (I just put it all back in the pan I baked the pasta in). Add the chicken and toss carefully to combine.

Serve it up! I garnished with some shredded parm and a dash of extra black pepper.

What else could you do with this? Add shrimp, broccoli, black olives to the sauce. Forgo alfredo, cut the pasta into big sheets, make a lasagna! Bake it in a circle and top it with pizza toppings! Cut it into bread-sized slices and grill a cheese!

I will be eating this many times, and, once you try it, I’m quite certain you will, too.
 

Healthy Fish and Kale Chips

3D78BFA7-2BB3-4C30-9CA9-E8ED145E0302.jpeg

New Year’s resolution anyone? Hello! What says healthy eating better than a baked white fish and kale? Literally can’t think of a healthier meal.

But, rather than sauteing the kale, I’ve decided to do a play on fish and chips.

Imagine: you’re me, and you’re 13 years old in Shannon, Ireland. And you order fish and chips. And they come on an actual newspaper, dripping with grease. Of course, these “chips” are french fries. Crispy, chewy, french fries covered in ketchup. And the fish is coated in a light and airy batter, doused in malt vinegar.

The memory is blissful, but the calories are not quite what I want now that I no longer have a 13-year-old metabolism. So, how about crispy, crunchy kale chips? And a fish that’s so flavorful, you don’ t miss the bread? It’s almost like being in Ireland again.

Okay, not at all. But, it’s a fast, healthy, January- friendly meal.

This is super easy and very flavorful, and will make up for all of those Christmas casseroles! It comes together in under 45 minutes and takes almost no effort at all!

There’s also very few ingredients! Savor every guilt-free bite. Enjoy!

INGREDIENTS:

  • 1 head of kale
  • cooking spray
  • seasoned salt
  • 4 tilapia fillets
  • olive oil
  • lemon zest
  • salt & pepper

TO PREPARE:
Make the kale chips: Preheat the oven 350′.
Tear the kale into 2-inch bites, then put on a parchment-lined baking sheet. Spray with cooking spray, top with seasoned salt, and toss to coat.
Bake for 15 minutes or until crunch.

Make the fish: Preheat the oven to 425′
Season the fish liberally with salt and pepper, and sprinkle on lemon zest.
Bake for 9-11 minutes.

Want another side item? Add some coleslaw!

Make coleslaw: Combine one cup light mayo, 1/4 cup milk, 1 tablespoon sugar, 1 tablespoon white vinegar, and salt& pepper. Whisk until smooth. Pour over a bag of shredded cabbage or coleslaw mix, and scoop next to the fish!

Ahoy, mates! Okay, forget I said that. Just eat the fish.